Philippians 4:13

I can do everything through Him who gives me strength. Philippians 4:13

Friday, October 5, 2012

Sewing Craft Activity: Felted Flowers

I was tooling around Pinterest looking for a fun activity that would also teach my daughter a little sewing, including the sewing on of a button. I came across a blog where flower shapes of different sizes were cut from a variety of felt colors, stacked on top of one another, and sewn together with a button center.

Cute. But I wanted more... so I added scraps of patterned fabric and stitching to bring these flowers to life. And my 8 year-old daughter absolutely LOVED this project.


Materials needed for this project are scrap pieces of various patterned fabric, complementary colors of felt fabric, embroidery thread, and a button.

I used 3 flower shaped patterns that I made and used for a previous project - the largest flower is about 3-1/4 inches wide, medium is about 2-3/4 inches, and smallest is about 2-1/4 inches. You can find flower shapes on the web to print and use as a pattern, or hand-draw your own flower shapes.


To make one 3-tier stacked flower, choose 3 pieces of different
pattern fabric and cut a flower from each piece
so that you will have one large flower,
one medium, and one small. Also cut one of each size
flower from the felt in a coordinating color as the flower of that size.
For one layer of the flower, place the pattern flower cut-out on top of the
same-size felt flower and stitch them together with several strands of a
contrasting color embroidery thread, using a whipstitch.
Do the same with the other two flower sizes.
The felt gives each layer a bit of stability and thickness.
Stack the three flowers on top of one another with the
largest on the bottom and the smallest on the top, and sew them
together with a button at the center.

I used this project to teach my daughter how to use a pattern to cut fabric, pin two pieces of fabric together, thread a needle, make stitches, and sew a button. It didn't go without a few tears of frustration and plenty of knots, but as she learned, it got easier for her, and she was ready to make a few more.

Finished flowers can be attached to a hair clip or to a pin to adorn a backpack, hat or jacket.
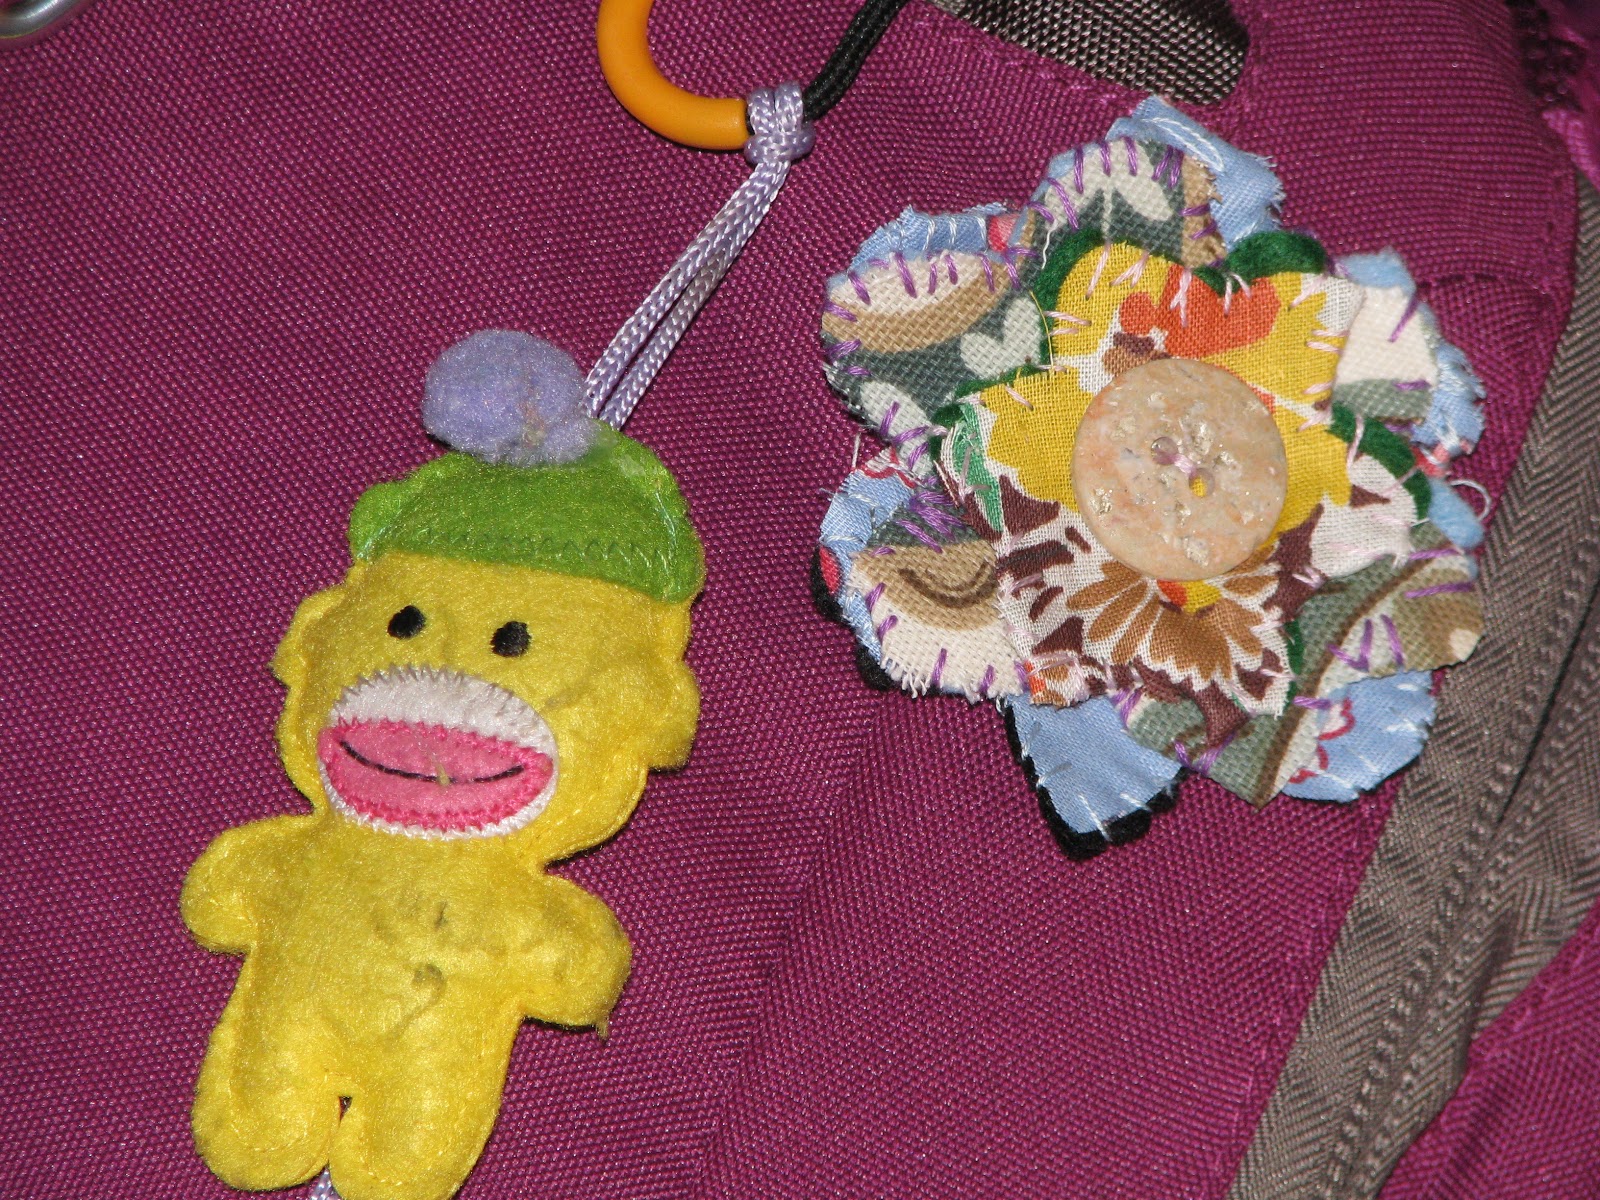
My daughter put her flower on a pin and
attached it to her backpack.


To every thing there is a season, and a time to every purpose under the heaven: A time to rend, and a time to sew; a time to keep silence, and a time to speak.  Ecclesiastes 3:1,7 

Saturday, September 22, 2012

Name Bugs Art Activity

Oh my! Has it been that long since I've written? I guess it's been that crazy busy around here and the girls and I have not had time to stop and be crafty. That. Must. Change.

One thing that keeps me on my toes is teaching my Sunday School class. I have 1st-3rd graders this year and last week we talked about names and what they mean. In Old Testament times, the meaning of a name was very important and often told about the character of that person.

I had my computer in class, and the children each loved finding out what their name means, and then we worked on a little art project and created Name Bugs.

Because of time constraints and the fact that the majority of my class have not learned to write in cursive, I prepared the first part of this activity ahead of time. An older child who can write their name in cursive could do this start to finish without help.


Begin by folding a piece of paper in half longways and create
a crease in the paper. Then open it back up and write the name
in cursive along the crease using a black crayon. Make sure
to press heavy to make it good and bold.
Then refold the paper and rub along all parts of the name
to transfer wax to the other side of the paper and create
a mirror image. Trace the transfer lines with your
black crayon.
Add color. Lots of color.
Get creative and add other designs and decorations to the page...
even polka-dots.
Love their finished artwork!
So, if you have paper and crayons, then you have all the ingredients for name bugs. An alternative idea would be to use water colors. Write the name in crayon on water color paper, and then use water color paint for the rest of the activity.


A good name is to be chosen rather than great riches, and favor is better than silver or gold. Proverbs 22:1

Tuesday, July 31, 2012

The First Hair Cut

A lot of parents have pictures from their kids' first hair cuts. It's normal.

For my 8-year-old daughter, that first hair cut happened today.

Several weeks ago she told me she wanted to cut her hair before school starts. I wish I could remember the conversation. I'm sure I'm the one who mentioned donating her hair, because it was so long, it seemed the natural thing to do. She was immediately excited about the idea. She wanted to help other kids.

We did a bit of research about places that take hair donations, like Locks of Love, Pantene's Beautiful Lengths program, and Wigs for Kids. After talking about what these organizations do, my daughter chose Wigs for Kids because the organization helps kids regardless of the reasons for hair loss.

A couple of weeks passed between her initial mention of cutting her hair and the actual appointment. I wanted to make sure she was sure this is what she wanted to do. It wasn't a spur of the moment decision. But she told me she wanted to do it, and she told me she wanted it done on July 31. So I made her appointment for 4:30 pm on July 31.

This is her hair the morning of her appointment.
Tracy making that first cut.
Two pony tails ready for donation.
Shoulder length and ready for 3rd grade!
A big huge thanks to Tracy at Tracy's Hair Studio for making our donation possible. Tracy did a great job, and I highly recommend her to anyone looking for a stylist.

Tracy's Hair Studio
20 Music Square West
Nashville, TN
615-248-8006


Are not two sparrows sold for a penny? Yet not one of them will fall to the ground outside your Father’s care. And even the very hairs of your head are all numbered. So don’t be afraid; you are worth more than many sparrows. Matthew 10:29-30